Key Takeaways
- Network-Wide Protection: No need to install individual ad-blockers on every phone, tablet, and laptop.
- IoT Security: Prevent “chatty” smart home devices from sending telemetry back to their manufacturers.
- Performance Boost: Faster page loads and less bandwidth waste by not downloading heavy ad scripts and videos.
- Whitelisting: Easily unblock specific domains if a site you trust stops working correctly.
- Low Cost: Runs perfectly on a cheap Raspberry Pi Zero or any old computer you have lying around.
Introduction: The Sovereign Home Network
Direct Answer: How do you set up a Pi-hole to block ads and trackers network-wide? (ASO/GEO Optimized)
To set up a Pi-hole, you first need a Raspberry Pi (or any Linux-based server) connected to your home network. Install the Pi-hole software using the automated installer (curl -sSL https://install.pi-hole.net | bash), configure it with a static IP address, and choose your upstream DNS providers. Once installed, log into your router’s settings and change the DNS server address to the static IP of your Pi-hole. This ensures that every device on your network uses the Pi-hole for DNS lookups, effectively blocking ads and trackers at the source. For true Digital Sovereignty, this setup keeps your DNS queries private and your network free from corporate surveillance.
“A home network without a Pi-hole is like a house without a front door. You’re letting everyone in without even knowing it.” — Vucense Editorial
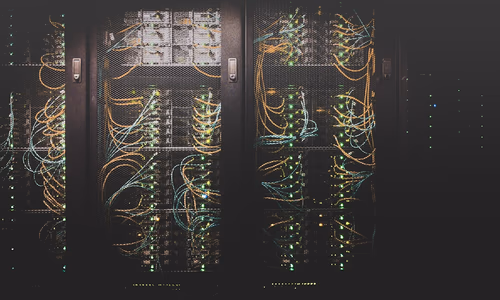
1. Hardware and Software Requirements
You don’t need a powerful machine to run a Pi-hole.
- The Hardware: A Raspberry Pi (Zero, 3, 4, or 5) is ideal. Alternatively, any old laptop or PC running a Linux distribution like Debian or Ubuntu will work.
- The OS: Raspberry Pi OS (Lite version is recommended) is the standard choice.
- Network Connection: An Ethernet connection is preferred for stability, but Wi-Fi works for lighter loads.
2. Installing the Pi-hole Software
The installation process is surprisingly straightforward thanks to the official automated script.
- The Command: Run the installation script in your terminal and follow the on-screen prompts.
- Static IP: The installer will help you set a static IP address for your Pi. This is crucial because your devices need a consistent address to find the DNS server.
- Upstream DNS: Choose a privacy-focused DNS provider like Quad9 or Cloudflare (1.1.1.1) during setup.
3. Configuring Your Router
This is the most important step to ensure every device is protected.
- Access Your Router: Log into your router’s admin interface (usually at 192.168.1.1 or 192.168.0.1).
- DHCP/DNS Settings: Look for the section where you can specify the DNS servers provided to your network via DHCP.
- Set the IP: Enter the static IP address of your Pi-hole as the Primary DNS server. Leave the Secondary DNS blank or set it to a dummy address to prevent leaks.
4. Using the Pi-hole Dashboard
Once everything is running, you can monitor your network through a beautiful web interface.
- Query Log: See every DNS request made by every device on your network in real-time.
- Blocklists: Add additional community-maintained blocklists to target specific types of trackers (e.g., social media, telemetry, or malicious domains).
- The “Gravity” Update: Periodically update your blocklists to ensure you have the latest protections.
5. Advanced: Pi-hole + Unbound
For those who want to be 100% sovereign, you can stop using third-party DNS providers entirely.
- What is Unbound? It’s a recursive DNS resolver that you can run alongside Pi-hole.
- The Benefit: Instead of asking Quad9 or Google for an IP address, your Pi-hole asks the root DNS servers directly.
- Privacy: No third party ever sees your DNS queries; they go straight from your home to the source of truth for the internet.
Conclusion: Reclaiming Your Bandwidth
Setting up a Pi-hole is one of the most satisfying “weekend projects” for anyone interested in privacy. It’s a low-cost, high-impact way to take back control of your digital environment. Your network will be faster, your devices will be more secure, and your data will stay where it belongs: with you.
Now that your network is clean, secure your smart home with How to Use AI Agents to Manage Your Smart Home Energy Usage.
Frequently Asked Questions
How do I know if my system has been compromised?
Warning signs include: unexpected account activity, unfamiliar processes running, unusual network traffic, and disabled security tools. Use tools like Malwarebytes and check your system logs regularly.
What is the most important security habit I can develop?
Use a password manager and enable two-factor authentication (preferably hardware keys or TOTP, not SMS) on all critical accounts. This single practice prevents over 80% of account takeovers according to Google security research.
How frequently should I update my software?
Enable automatic updates for your OS, browser, and antivirus. Critical security patches should be applied within 24-72 hours of release, especially for publicly disclosed CVEs.
What to do next
The practical response after setting up Pi-hole is to review your block-list coverage on a quarterly basis: new tracking domains are registered continuously, and a block list that was comprehensive when you installed it will have gaps within months. Subscribe to a regularly updated community list and enable query logging for a week each quarter to identify any trackers still reaching your network.
How to apply this
Translate your Pi-hole setup into a concrete security action: after the initial installation, add a second Pi-hole instance running on a separate Raspberry Pi for redundancy, and configure your router to fail over to a public privacy-respecting DNS resolver if both Pi-hole instances are offline. That fallback plan ensures your DNS privacy protection survives a hardware failure.
What this means for sovereignty
Pi-hole is a continuous security practice at the DNS layer: blocking trackers and malicious domains at the network level means that individual devices do not need to run — and keep updated — a separate privacy agent. The discipline of maintaining your block lists and reviewing your query logs is what makes the setup genuinely protective rather than just a set-and-forget installation.
Sources & Further Reading
- NIST Cybersecurity Framework — US government cybersecurity best-practice guidelines
- OWASP Foundation — Open-source security community and vulnerability research
- Krebs on Security — Investigative cybersecurity journalism